

AssessDistinguish a dry or whitened surface from actual material loss.
Vallaboden - base damage and repair
Burnt bases and ice burn on alpine skis
White, grey or hollowed-out areas near the steel edge can be caused by anything from a dry base to genuine ice burn. Here you will learn to tell the problems apart, prevent the damage and determine what can be repaired at home.
Vallaboden's main rule
Wax can restore a dry surface, but cannot replace base material that has been worn away or melted away. Always determine what type of damage you are seeing before proceeding.
StopDo not keep heating or scraping until you know what has happened.
ProtectBuild a durable wax layer for hard, abrasive snow.
RepairOnly repair small, straightforward damage at home.
Start with the right diagnosis
Three very different problems can look almost identical
A white or grey surface does not automatically mean ice burn. Before repairing it, determine whether the base is merely dry and dirty, has overheated during waxing, or has actually lost material near the steel edge.
The surface is pale but still flat
The base can look grey, white or dull after hard snow, prolonged use or insufficient waxing. Feel it with your fingertip and place a straightedge across it. If there is no clear hollow, cleaning, brushing and fresh glide wax may be enough.
Signs: widespread discolouration, no sharp boundary around the damage and no obvious material loss.The base has swollen, become wavy or turned glossy
Excessive temperature, an iron left stationary or too little wax between the iron and base can cause local heat damage. The surface may become raised or uneven, and the problem often becomes apparent as soon as you start scraping.
Signs: local deformation after waxing and a surface that no longer feels flat.A hollowed-out strip follows the steel edge
During long, heavily loaded turns on hard, icy snow, high pressure and friction can cause severe wear. Damage often starts beside the steel edge, especially under the boot where the load is high.
Signs: a narrow, rough or recessed strip where base material is actually missing.A simple check
First clean a small area and apply a normal layer of glide wax. If the colour evens out and the surface stays flat, the problem was probably superficial. If a hollow, rough surface or distinct edge remains, wax has not replaced the missing material.
Two types of heat damage
The same term is often used for two very different events
One type of damage happens in the wax room. The other occurs while skiing. They therefore need different treatment, even though both are commonly called a burnt base.
Overheating during waxing
The base is damaged when heat is concentrated on a small area or the temperature exceeds what the wax and base can withstand. This can happen even at the correct temperature setting if the iron stops or the wax layer is too thin.
- Follow the recommended iron temperature for the wax.
- Keep the iron moving steadily from tip to tail.
- Make sure there is always molten wax between the iron and base.
- Stop if the surface gives off an odour, smokes, turns glossy or starts to change shape.
Do not try to heat away heat damage
Let the ski cool completely. If the base has swollen or become wavy, have a workshop assess its flatness before removing more material.
Ice burn while skiing
Hard or abrasive snow, high speed and sustained edge pressure can cause extreme wear beside the steel edge. Material can be worn, torn or partly melted away, especially directly under the boot.
- Most common on hard, icy or very abrasive artificial snow.
- Appears as lengthwise damage near the steel edge.
- The risk increases if the wax layer is thin or worn away.
- Racing, high speed and heavy edge pressure place the greatest demands on the base.
Wax protects but does not rebuild the base
A durable wax layer reduces friction and wear. Once polyethylene is missing, an actual base repair is needed.
Real examples from Vallaboden
What real ice burn near the steel edge can look like
The photos show actual material loss near the steel edge, rather than simply a dry or poorly brushed base. Compare them with your skis and check whether the surface is only discoloured or has developed a clear hollow.

A long, pale, hollowed-out strip directly beside the steel edge.
Open image 1 in a new tab
The damage follows the steel edge in the most heavily loaded part of the ski.
Open image 2 in a new tab
Close-up of severe material loss right beside the steel.
Open image 3 in a new tabConditions when the damage occurred: The photos show new race skis from the 2020 model year. The skier was U14, the discipline was giant slalom, and the surface was very icy on a steep, high-speed slope.
Prevent damage on abrasive snow
What can you do to prevent burned bases?
On hard, icy, highly abrasive snow, the wax must withstand very high friction and loads near the steel edges. Build a substantial, hard, well-bonded wax layer before skiing.
Use hard wax and build a durable layer
Use the hardest, coldest-rated wax possible. On icy, highly abrasive snow it can glide well even when its temperature range is far below the actual temperature. First apply graphite wax as a base layer: it bonds well to the ski base and helps the green or cold-weather wax stay in place. Apply plenty of wax and brush less aggressively than usual. After scraping, brush only until the ski is smooth and even.
Start with a clean, even base
Dirt and old, uneven wax layers make it harder to build a durable foundation. Clean and inspect the strip closest to the steel edge in particular.
Apply a graphite base layer
Graphite wax bonds well to the base and provides a stable foundation that helps hard green or cold-weather wax adhere better.
Choose a very hard, cold-weather wax
On icy, highly abrasive snow, wax rated for temperatures far below the actual temperature can still glide well while improving durability.
Apply plenty of wax and iron it in evenly
Apply enough wax across the entire base, especially near the steel edges. Keep the iron moving and let the wax cool before scraping.
Brush less than for a normal finish
After scraping, brush only until the base is smooth and even. In these conditions, the durable wax layer should remain to protect the base.
Check the skis between sessions
After hard training or racing, dry, inspect and rewax the skis before the area beside the steel edge becomes completely dry.
Choose the right level of repair
From rewaxing to professional base repair
What matters is not how dramatic the colour looks, but whether material is missing, how deep the area is, and whether the edge, core or flatness is affected.
Clean, brush and wax
The surface is grey or white but still even. There is no clear hollow, loose base edge or exposed core. Start with gentle cleaning and normal glide waxing.
Suitable when: the colour improves and the surface feels flat after treatment.Careful home repair may work
A short, shallow hollow can sometimes be filled with base repair material. The area must be clean and dry, and the damage must not reach the core or involve a loose steel edge.
Suitable when: you have the right tools, can work safely and accept that a repair candle has more limited capabilities than workshop equipment.Take the ski to a workshop
Long damage near the steel edge, a swollen base, exposed core, loose edge or uneven base requires professional assessment. Repair material must first be securely bonded, after which the surface is levelled and structured.
Suitable when: damage affects a larger loaded area or a home repair is likely to come loose.Small base repairs at home
How to fill small, straightforward damage with P-Tex
A repair candle is best for small, local scratches and hollows. Damage right beside a loose steel edge, reaching the core or covering a long, heavily loaded area should be left to a workshop.
Open flames and molten polyethylene require care
Work on a fire-resistant surface with good ventilation, safety glasses and a means of extinguishing a fire close by. Keep flammable materials away and always follow the repair candle instructions. If unsure, use a workshop.
Let the ski dry and reach room temperature
Moisture, cold and condensation impair the repair. Dry the ski and leave it indoors before starting.
Clean the area thoroughly
Remove dirt and wax residue with glide wax cleaner and a lint-free cloth. Let the area dry completely.
Remove only loose material
Carefully cut or scrape off flaps that are already loose. Do not enlarge the damage or cut into the steel edge or core.
Heat the repair candle as instructed
A typical repair candle uses a flame, with material dripped or applied carefully into the damage. Avoid sooty combustion and do not let the flame heat the ski base directly.
Fill slightly above the surface
The material shrinks as it cools. Fill slightly above the surrounding surface without covering an unnecessarily large area.
Let the repair cool completely
Do not try to level a warm repair. Once the material is completely cold, it is easier to cut evenly and less likely to pull out.
Level carefully with a steel scraper or panzer file
Use very light, controlled strokes. The tool should remove excess repair material, without cutting into the sound base or changing the steel edge height.
Smooth, clean and wax
Finish with fine Fibertex, wipe clean and check flatness. Then apply glide wax. If the repair comes loose or the surface will not level out, have a workshop assess the ski.
When a workshop is the right choice
Deep damage near the steel edge needs stronger bonding and restored flatness
A professional workshop can feed or melt repair polyethylene more precisely, level the surface and then restore its structure. Stone grinding alone does not fill missing material - repair comes before the final grind.
Take the ski in if any of these apply
- The damage is long, deep or directly against the steel edge.
- The core, fibreglass or other material beneath the base is exposed.
- The steel edge is loose, bent, cracked or displaced.
- The base has swollen or become wavy after ironing.
- An earlier P-Tex repair repeatedly comes loose.
- The ski is no longer flat or the structure is badly damaged.
A typical workshop process
The exact method depends on the damage and the workshop equipment, but the usual sequence is:
- Cleaning and removal of loose or damaged material.
- Controlled application or melting of repair polyethylene.
- Cooling and mechanical levelling of the repair.
- Belt or stone grinding to restore a flat surface and structure.
- Checking the steel edges and base, followed by final waxing.
Common mistakes
It is easy to make a small problem worse
Work slowly and stop if unsure. Above all, avoid removing sound base material, changing the steel edge height or exposing an already heat-damaged ski to further heat.
Calling every white patch ice burn
A dry or dirty base can look dramatic but often has no actual hollow.
Trying to wax away material loss
Wax reduces friction but does not replace polyethylene that is already missing.
Heating the damage with the waxing iron
More heat can deform the base further and make a later repair harder.
Filling a dirty or damp area
The repair material bonds less securely and can come loose after only a few runs.
Levelling the repair before it cools
Warm material can easily pull out of the damage or smear across the sound base.
Scraping into the sound base
The steel scraper should level the repair material, without changing the flatness of the ski.
Repairing beside a loose steel edge at home
An unstable edge needs structural repair first. P-Tex alone will not hold the ski together.
Choosing very hard wax without temperature control
Hard waxes often require high temperatures. Follow the instructions and use an iron with stable temperature control.
Products for the process
Clean, protect and repair with the right type of product
Find products to assess, protect and repair the base. Choose the variant and application method to suit the ski and current conditions.
Assess and clean
Start with a clean surface so you can tell whether the problem is dirt, dryness or actual material loss.

Protect against abrasive snow
Use durable glide wax and a compatible hardener before skiing on hard, icy or highly abrasive snow.

Minor base repair
For small, straightforward damage: base repair material, a very sharp levelling tool and a fine finish.
-
Black P-Tex
 Available to order
Swix
Swix Base Material Black
Polyethylene repair stick for less deep scratches and localized damage in black ski bases.
For small, uncomplicated damage. Let the material cool completely before scraping, and leave deep edge-adjacent damage to a workshop.
-
Transparent P-Tex
 Available to order
Swix
Swix Base Material Transparent
Repair material for transparent or light-colored bases where black material would be clearly visible.
Choose the color to match the base. The color choice affects appearance, not whether structural damage is suitable for home repair.
-
Scraping
 Available to order
SkiGo
Skigo Steel Scraper
Ground steel scraper for carefully removing excess material after a minor base repair.
Use light, controlled strokes. The scraper should level the repair, not cut down into sound base material.
-
Fine finish
 Available to order
Swix
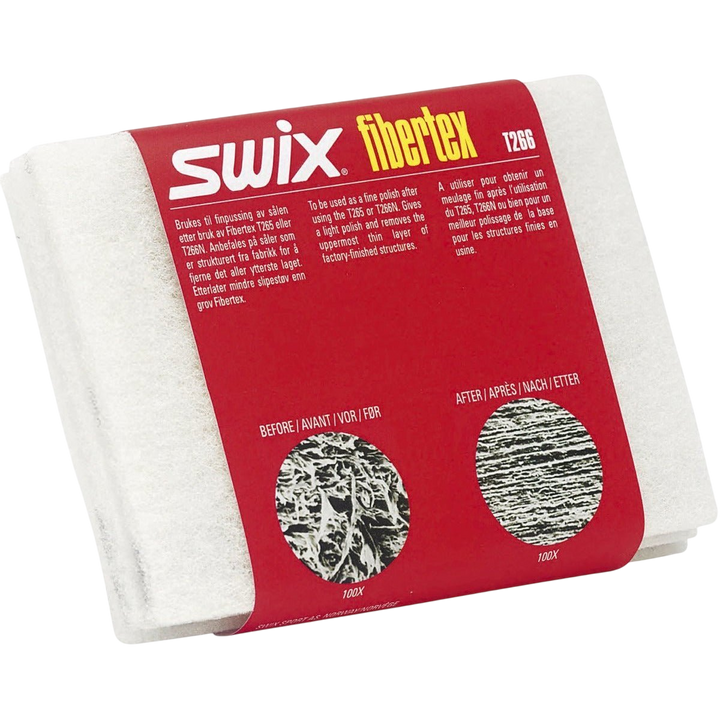
Swix Fibertex Fine
Fine Fibertex for smoothing very small irregularities and giving the repair a cleaner finish.
Use with light pressure after scraping. Fibertex does not replace a properly flat surface or professional stone grinding.


Continue in Vallaboden
Related alpine ski guides
Ice burn is linked to cleaning, base preparation, glide waxing and edge care. These guides are useful before and after a base repair.
Diagnosis and cleaning
Cleaning alpine skis
Choose between brushing, glide wax cleaner and hot scraping without treating the base more aggressively than necessary.
Read the guide Prevent wearGlide wax alpine skis
Iron in, cool, scrape and brush a fluoro-free wax layer suited to the current conditions.
Read the guide Build a good foundationBase prep alpine skis
Prepare a new, freshly ground or repaired base with cleaning, saturation waxing and an even finish.
Read the guide Steel edgesSharpening steel edges
Understand base bevel, side-edge angle, filing and polishing without damaging the base beside the edge.
Read the guide StorageStoring alpine skis for summer
Protect an intact or repaired base and prevent steel-edge rust during the off-season.
Read the guide ToolsWaxing equipment for alpine skis
Set up a safe, stable workspace with the right ski supports, iron, scrapers, brushes and edge tools.
Read the guideFrequently asked questions
Questions about burnt bases and ice burn
Answers about ice burn, heat damage, preventive waxing and when a base needs repair.
The term is used for two different types of damage. One is overheating from the waxing iron, which can make the base swollen or uneven. The other is severe friction wear during skiing, often as a gouged-out zone right next to the steel edge on hard and icy snow.
A dry or whitened base is often still flat and can improve after cleaning, brushing, and waxing. Ice burn normally has a clearly rough or depressed zone where base material is missing, often along the steel edge under the boot area.
Yes. Excessive temperature, moving too slowly, letting the iron stop, or having too little melted wax between the iron and the base can concentrate the heat. Follow the wax’s iron temperature, keep the iron moving, and stop if the surface starts to smoke, smell, or change shape.
Areas next to the steel edge are exposed to high pressure when the ski is on edge. In long, loaded turns on hard or aggressive snow, friction and wear can become very severe, especially under the middle of the boot where the load is high.
Only if the surface was actually dry, dirty, or superficially whitened. Wax can even out the color and reduce friction, but it cannot replace polyethylene that has already worn away. A remaining gouge needs repair material or workshop service.
Yes. On very icy and base-burning snow, a truly hard, cold wax can provide both good glide and better durability even if the wax’s stated temperature range is far below the actual temperature. In that case, the aggressiveness of the snow matters more than following the air temperature slavishly.
Graphite wax bonds well to the ski base and provides a durable base layer that helps the green or cold wax on top stay in place longer. This is especially relevant on hard, icy, base-burning snow where wear near the steel edge becomes severe.
A short, shallow, uncomplicated area of damage can sometimes be repaired with a repair stick. If the damage is long, lies directly against a loose steel edge, reaches the core, or is in a heavily loaded area, a professional repair is safer and usually lasts longer.
When the surface needs to be made flat and the structure restored over a larger area. Stone grinding does not fill in missing material, so deep damage is repaired first. After that, the workshop can grind and structure the base evenly.
Yes. Snowboards have the same type of polyethylene base and steel edges and can suffer both overheating from a waxing iron and friction damage near the edge. Assessment and repair principles are largely the same, but the larger surface area may require different tools and more workshop work.
Assess first - repair afterwards
Not sure whether the damage can be repaired at home?
Send a clear photo of the entire damage and a close-up along the steel edge. That makes it easier to assess whether cleaning and waxing is enough, whether a small P-Tex repair is reasonable, or whether the ski should be taken to a workshop.